|
This version is still in development and is not considered stable yet. For the latest stable version, please use StreamX Guides 1.1.0! |
Serve dynamic content with StreamX and AEM
In this tutorial, you will learn how to create a Dynamic Carousel Component that displays data coming from StreamX.
You will use Apache Dispatcher with the SSI module enabled to make the Carousel Component dynamic, allowing it to display frequently changing data without the need for cache invalidation.
This tutorial covers the following topics:
-
AEM and Dispatcher setup by using AEM Compose
-
Running the StreamX Mesh
-
Building new Dynamic Carousel Component on AEM
-
Feeding the StreamX Mesh with data by using StreamX CLI
Prerequisites
-
Roughly 30 minutes
-
AEM 6.5 installation file (
cq-quickstart-6.5.jar) and a valid license file (license.properties) -
A web browser of your choice
Verify if no other application uses ports 80, 4502 and 4503 (AEM ports) and 8081 (StreamX REST Ingestion port)
|
Step 1: Get the sources
Clone the Git repository containing source files for the example:
git clone https://github.com/streamx-dev/streamx-docs-resources.gitStep 2: Set up AEM and Dispatcher
-
Open the terminal and go to
serving-dynamic-content-aem-tutorialinside the cloned project directory. -
Copy your AEM 6.5 installation file and license file to the
[cloned-repository-path]/serving-dynamic-content-aem-tutorial/aem/home/libdirectory. -
Set up your AEM stack by executing the following command:
sh taskw setupBe patient, the initial setup might take some time to create author, publish and dispatcher instances. Once it’s done you can verify the setup by visiting http://publish.aem.local/, where you should see the We.Retail landing page. setup command must be run only once. When you finish you can stop AEM stack and start again:
sh taskw stop
sh taskw start
Step 3: Run the StreamX Mesh
-
Open the terminal and go to
serving-dynamic-content-aem-tutorialinside the cloned project directory. -
Run the StreamX Mesh by using the following command:
streamx run -
Wait for the following output:
-------------------------------------------------------------------
STREAMX IS READY!
-------------------------------------------------------------------
...
-------------------------------------------------------------------
Network ID:
...
Mesh configuration file: ./mesh.yaml
-------------------------------------------------------------------
Step 4: Feed the StreamX Mesh
You must inform the StreamX Mesh how to generate the content for the new component.
Remember to run streamx commands from the same folder, since they rely on relative paths.
|
-
Let’s publish the renderer of the component that has HTML content with some placeholders to be filled by StreamX when data arrives.
streamx publish -s 'template.bytes=file://templates/carousel.html' renderers carousel.html -
Publish the context with all required information about what and how it should be generated.
streamx publish -j 'file://context/fragments-rendering-context.json' rendering-contexts fragments-rendering-context -
Add some sample product data to StreamX by executing the following 3 commands:
streamx publish -s 'content.bytes=file://products/product_1.json' data product:1streamx publish -s 'content.bytes=file://products/product_2.json' data product:2streamx publish -s 'content.bytes=file://products/product_3.json' data product:3 -
Visit http://localhost:8081/published/weretail/_fragments/collected:products:cheapest-by-category:Biking.carousel.html in any web browser, and verify three published product are present, though unstyled.
Let’s break down the URL:
-
localhost:8081is where the StreamX Web Delivery Service listens for requests. -
/published/weretail/_fragments/is the base prefix for carousel fragments. -
collected:products:cheapest-by-category:Bikingrefers to:-
an aggregated dataset, in this example, the cheapest products grouped by category:
collected:products:cheapest-by-category -
with the key, in this example, category:
Biking.
-
-
.carousel.htmlis the suffix for carousel fragments.
Step 5: Create dynamic carousel component
-
Create the component
-
Log in to AEM author with default credentials admin/admin.
-
Visit AEM author - CRXDE - /apps/weretail/components/content.
-
Right-click on the
contentnode and selectCreate ... / Create Component. -
Fill in the following properties:
-
Label:
dynamicproductcarousel -
Title:
Dynamic Product Carousel -
Group:
We.Retail
-
-
Save your changes.
-
-
Replace component’s template
-
Rename
dynamicproductcarousel/dynamicproductcarousel.jsptodynamicproductcarousel/dynamicproductcarousel.htmland save the changes. -
Replace node’s content with the following snippet:
<sly data-sly-test="${wcmmode.disabled}"> <!--#include virtual="/published/weretail/_fragments/collected:products:cheapest-by-category:Biking.carousel.html" --> </sly> <sly data-sly-test="${!wcmmode.disabled}"> Product carousel's content will be injected by Dispatcher through SSI. </sly> -
Right-click on the newly created
dynamicproductcarouselnode and selectCreate ... / Create Dialogwith just the defaults. -
Save your changes again.
-
-
Activate the component
-
Use
/apps/weretail/components/content/dynamicproductcarouselas start path. -
Untick
Only Modifiedand do the activation.
Step 6: Add the component to the page
-
Visit the AEM author - EN Blueprint page.
-
Add a new Dynamic Product Carousel component above the Title component with text DISCOVER THE FINEST GEAR.
-
Use the Rollout Page option from the page action bar.
-
Visit AEM author - US EN page.
-
Use the Publish Page option from the page action bar.
-
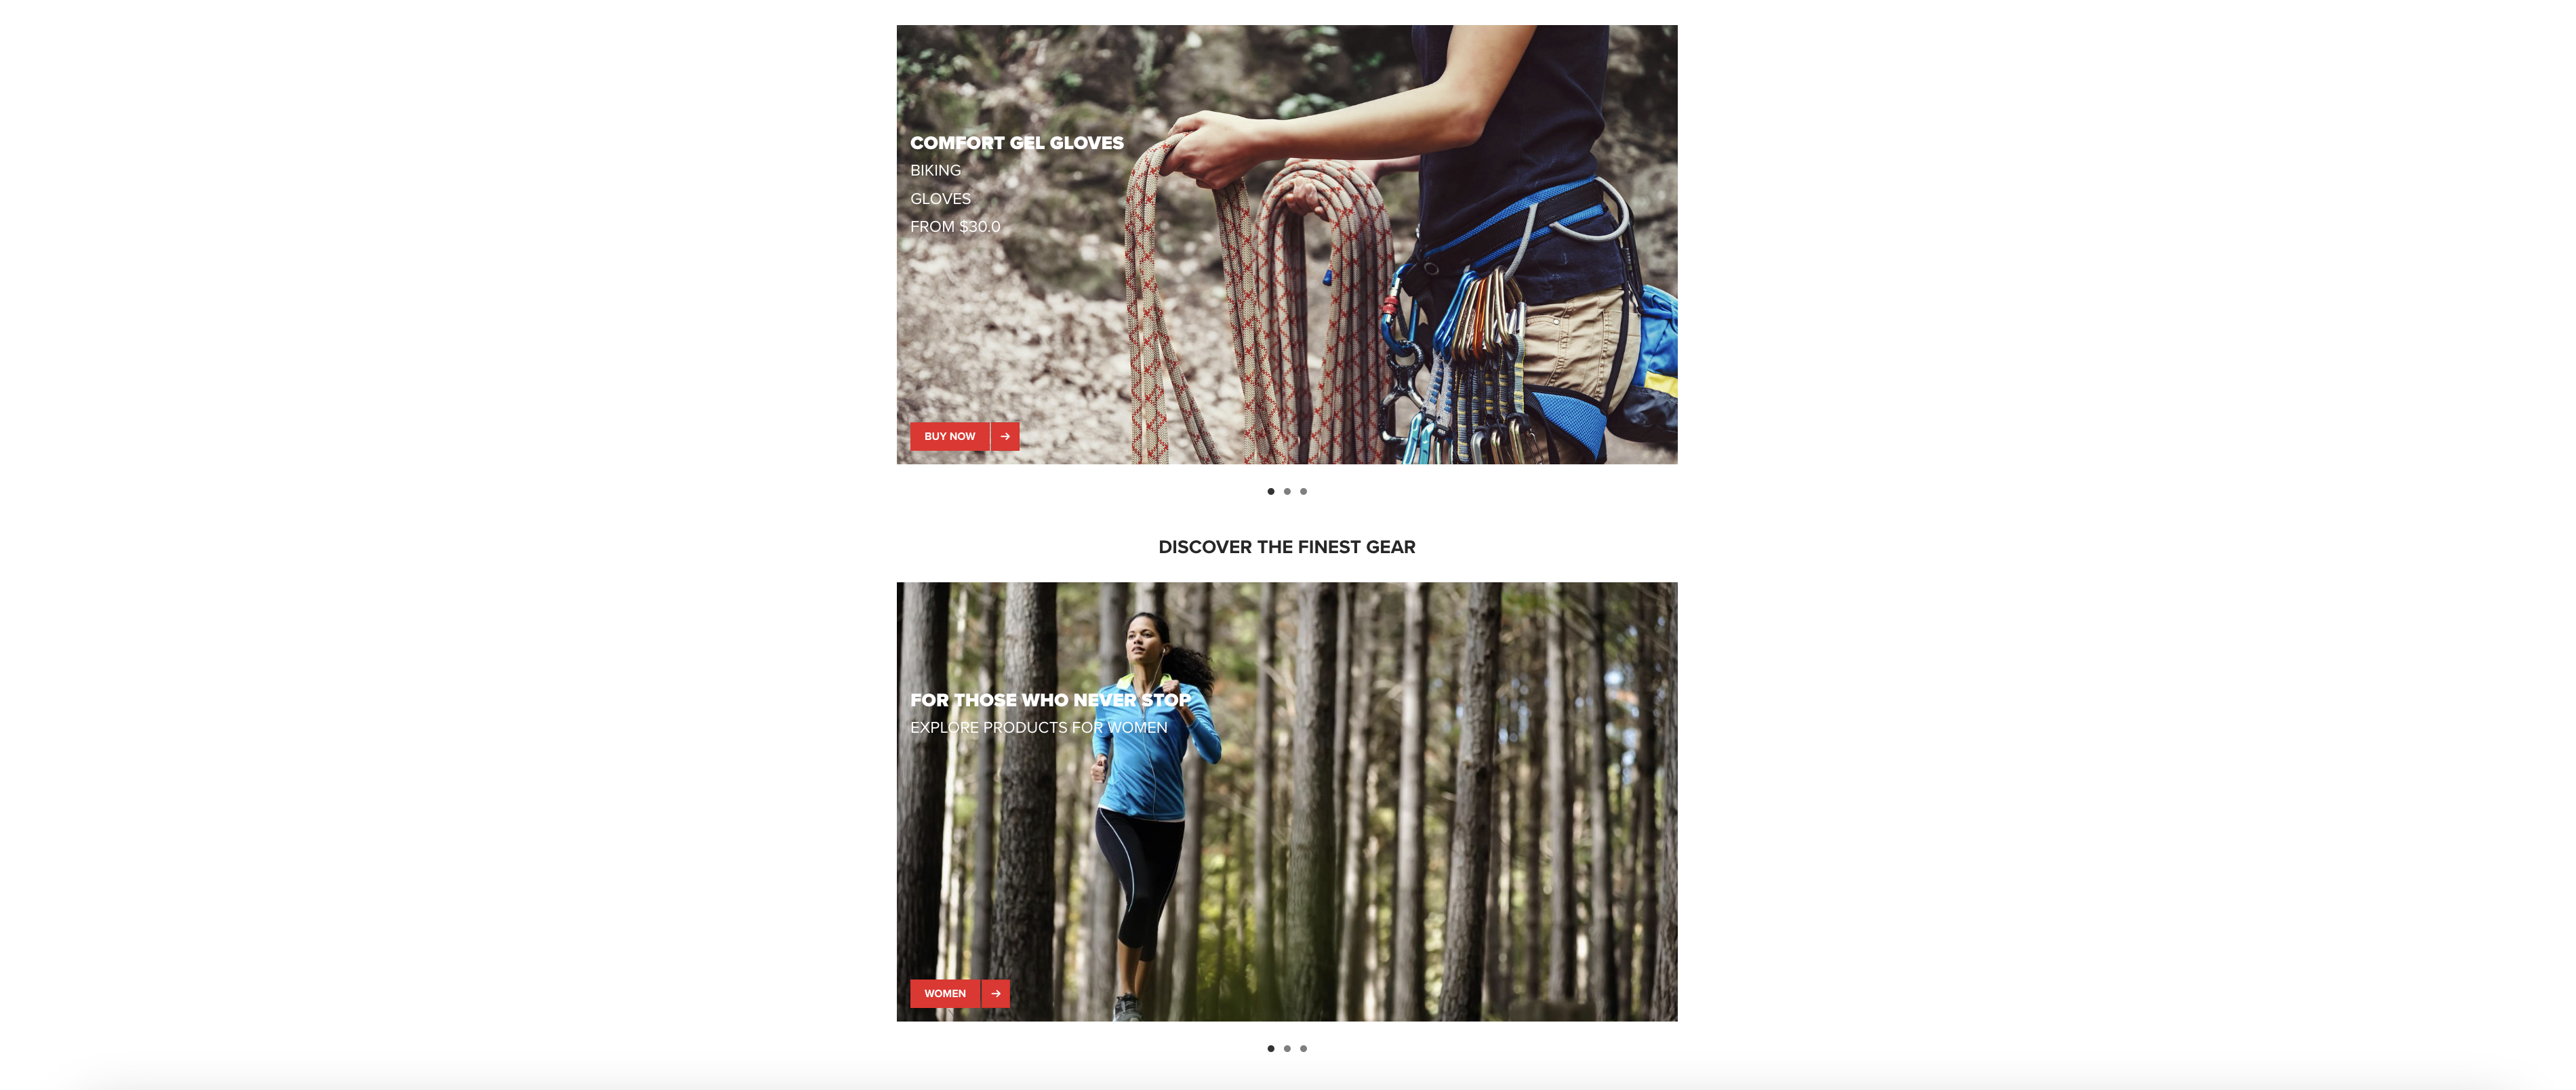
Visit http://publish.aem.local/content/we-retail/us/en.html in any browser (it might take some time for AEM to compile all the client libraries if you are visiting a We.Retail page for the first time), and you should see a fully functional carousel with 3 products above the DISCOVER THE FINEST GEAR text, which is shown on the image below.
 Figure 1. Dynamic Carousel
If you examine the order of the items within the carousel, you will notice that they are ordered by price in ascending order, exactly the way our StreamX Mesh was configured.
Step 7: Update dynamic content
-
Add the fourth product (with the lowest price) by executing:
streamx publish -s 'content.bytes=file://products/product_4.json' data product:4 -
Visit http://publish.aem.local/content/we-retail/us/en.html again. Verify that:
-
The new product is located at the first place.
-
Other products are moved to the right (so the previous 3rd product is no longer available in the carousel, due to the StreamX Mesh configuration).
-
Summary
Congratulations! You have just built and validated a new AEM component, which is able to dynamically load product information from StreamX.
Dispatcher configuration
-
Allow SSI in
conf.d/enabled_vhosts/we-retail_publish.vhostOptions +Includes AddOutputFilter INCLUDES .html
-
Prevent product carousel fragment URLs from being rewritten in
conf.d/rewrites/we-retail_rewrite.rulesRewriteCond %{REQUEST_URI} !^/published/weretail/_fragments -
Allow proxying requests for product carousel fragments toward StreamX in
conf.d/proxy/streamx.proxyProxyPassMatch "^/(.*/_fragments/.*\.carousel\.html)$" "http://host.docker.internal:8081/$1"